Raspberry PI with dump1090 and PiAware
Hardware
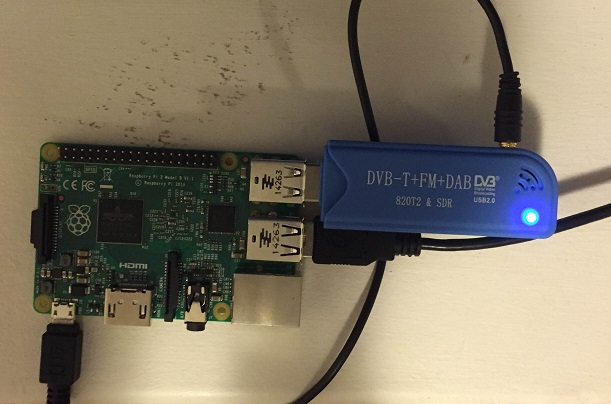
- RTL2832U & R820T2
- Raspberry PI 2

Preparing the Raspberry PI
Install your preferred build of Raspbian. I used Raspbian Jesse Light as a desktop environment is not needed for dump1090/PiAware, everything can be done through an ssh terminal. Latest build supported by the Raspberry Pi foundation is here
- https://www.raspberrypi.org/downloads/raspbian/
- Installation guides for writing the chosen image to a micro SD card can be found here
Once the Raspberry Pi is up with a build of debian login using the following credentials (note this is for Raspbian Jesse and may differ with other builds)
username: pi
password: raspberry
Configuration can be performed remotely from here on out. To do this find the IP address of the device
ifconfig
This will give an output that looks something like this. Look under eth0 for the network address of the device (10.190.78.41 is my address in the below output)
pi@raspberrypi:~ $ ifconfig
eth0      Link encap:Ethernet  HWaddr XX:XX:XX:XX:XX:XX
          inet addr:10.190.78.41  Bcast:10.190.78.255  Mask:255.255.255.0
          inet6 addr: fe80::37c9:d737:bed2:e836/64 Scope:Link
          UP BROADCAST RUNNING MULTICAST  MTU:1500  Metric:1
          RX packets:10844 errors:0 dropped:25 overruns:0 frame:0
          TX packets:3017 errors:0 dropped:0 overruns:0 carrier:0
          collisions:0 txqueuelen:1000
          RX bytes:9831206 (9.3 MiB)  TX bytes:299259 (292.2 KiB)

lo        Link encap:Local Loopback
          inet addr:127.0.0.1  Mask:255.0.0.0
          inet6 addr: ::1/128 Scope:Host
          UP LOOPBACK RUNNING  MTU:65536  Metric:1
          RX packets:0 errors:0 dropped:0 overruns:0 frame:0
          TX packets:0 errors:0 dropped:0 overruns:0 carrier:0
          collisions:0 txqueuelen:0
          RX bytes:0 (0.0 B)  TX bytes:0 (0.0 B)
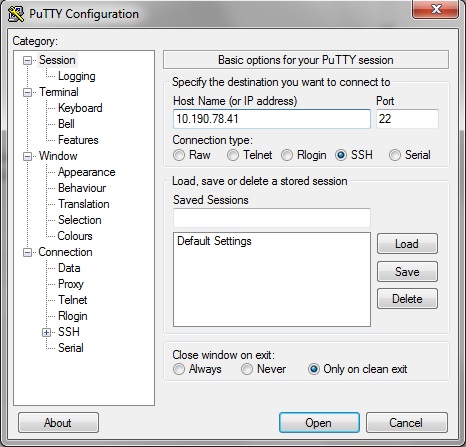
I was using Windows to remote into the Raspberry PI. A decent SSH client for Windows is Putty but feel free to use anything you prefer.

Make sure everything on the Pi is up to date, this will take a fair while…
sudo apt-get update
sudo apt-get upgrade
Setup SDR-RTL
Install packages required to build SDR-RTL
sudo apt-get install git git-core cmake libusb-1.0-0.dev build-essential pkg-config
Build sdr-rtl
git clone git://git.osmocom.org/rtl-sdr.git
cd rtl-sdr/
mkdir build
cd build
cmake ../
make
sudo make install
sudo ldconfig
If everything above was compiled and returns no errors sdr-rtl package is now installed
- Build guide used above for sdr-rtl was sourced from here. If there are any errors thrown by the above process have a look here as it has a number of common issues and fixes for them.
Copy the device rules to the correct location
cd ~
sudo cp ./rtl-sdr/rtl-sdr.rules /etc/udev/rules.d/
sudo reboot
After the reboot run the following
rtl_test -t
From this point this guide was followed. The response from the above command should be something similar to the following
pi@raspberrypi:~ $ rtl_test -t
Found 1 device(s):
  0:  Realtek, RTL2838UHIDIR, SN: 00000001

Using device 0: Generic RTL2832U OEM

Kernel driver is active, or device is claimed by second instance of librtlsdr.
In the first case, please either detach or blacklist the kernel module
(dvb_usb_rtl28xxu), or enable automatic detaching at compile time.

usb_claim_interface error -6
Failed to open rtlsdr device #0.
Note that this is the generic driver that is used to receive TV so is no use for using with dump1090. To fix this do the following (based on this guide)
cd /etc/modprobe.d
sudo nano no-rtl.conf
Put the following in the conf file
blacklist dvb_usb_rtl28xxu
blacklist rtl2832
blacklist rtl2830
Save and reboot again
sudo reboot
When the device comes back up re-run the test command
rtl_test -t
This time the following response was given
Found 1 device(s):
  0:  Realtek, RTL2838UHIDIR, SN: 00000001

Using device 0: Generic RTL2832U OEM
Found Rafael Micro R820T tuner
Supported gain values (29): 0.0 0.9 1.4 2.7 3.7 7.7 8.7 12.5 14.4 15.7 16.6 19.7 20.7 22.9 25.4 28.0 29.7 32.8 33.8 36.4 37.2 38.6 40.2 42.1 43.4 43.9 44.5 48.0 49.6
[R82XX] PLL not locked!
Sampling at 2048000 S/s.
No E4000 tuner found, aborting.
Setup dump1090
Following the guide here. Clone the dump1090 repository
cd ~
git clone git://github.com/MalcolmRobb/dump1090.git
cd dump1090
make
If everything has been built correctly and is connected then dump1090 can be started
./dump1090 --interactive
or if the Raspberry PI is running without a display over the network
./dump1090 --interactive --net
An example of the output for interactive net mode
Hex     Mode  Sqwk  Flight   Alt    Spd  Hdg    Lat      Long   Sig  Msgs   Ti-
-------------------------------------------------------------------------------
7CF7C4  S           PHRX1A                                        7     8    3
There are a few ways to run the application in the background To allow dump1090 to run in the background and still look at the output from it the following can be done
sudo apt-get install screen
screen -S dump1090
./dump1090 --interactive --net
To just run dump1090 in the background (persist after you logout) run the following command (or any command and follow it with an ampersand)
./dump1090 --quiet --net &
Daemonize dump1090
Following the guide here. Create a new file for daemon script
sudo nano /etc/init.d/dump1090.sh
Contents:
#!/bin/bash
### BEGIN INIT INFO
#
# Provides:		dump1090
# Required-Start:	$remote_fs
# Required-Stop:	$remote_fs
# Default-Start:	2 3 4 5
# Default-Stop:		0 1 6
# Short-Description:	dump1090 initscript

#
### END INIT INFO
## Fill in name of program here.
PROG="dump1090"
PROG_PATH="/home/pi/dump1090"
PROG_ARGS="--interactive --net --no-fix --net-ro-size 500  --net-ro-rate 5"
PIDFILE="/var/run/dump1090.pid"

start() {
      if [ -e $PIDFILE ]; then
          ## Program is running, exit with error.
          echo "Error! $PROG is currently running!" 1>&2
          exit 1
      else
          ## Change from /dev/null to something like /var/log/$PROG if you want to save output.
          cd $PROG_PATH
          ./$PROG $PROG_ARGS 2>&1 >/dev/null &
          echo "$PROG started"
          touch $PIDFILE
      fi
}

stop() {
      if [ -e $PIDFILE ]; then
          ## Program is running, so stop it
         echo "$PROG is running"
         killall $PROG
         rm -f $PIDFILE
         echo "$PROG stopped"
      else
          ## Program is not running, exit with error.
          echo "Error! $PROG not started!" 1>&2
          exit 1
      fi
}

## Check to see if we are running as root first.
## Found at http://www.cyberciti.biz/tips/shell-root-user-check-script.html
if [ "$(id -u)" != "0" ]; then
      echo "This script must be run as root" 1>&2
      exit 1
fi

case "$1" in
      start)
          start
          exit 0
      ;;
      stop)
          stop
          exit 0
      ;;
      reload|restart|force-reload)
          stop
          start
          exit 0
      ;;
      **)
          echo "Usage: $0 {start|stop|reload}" 1>&2
          exit 1
      ;;
esac
exit 0
Make the file executable
sudo chmod +x /etc/init.d/dump1090.sh
Add the run level shortcuts
sudo update-rc.d dump1090.sh defaults
Now the following commands can be used. The dump1090 service will also start automatically on boot
sudo /etc/init.d/dump1090.sh stop
sudo /etc/init.d/dump1090.sh start
sudo update-rc.d -f dump1090.sh remove
Dump1090 Web Interface
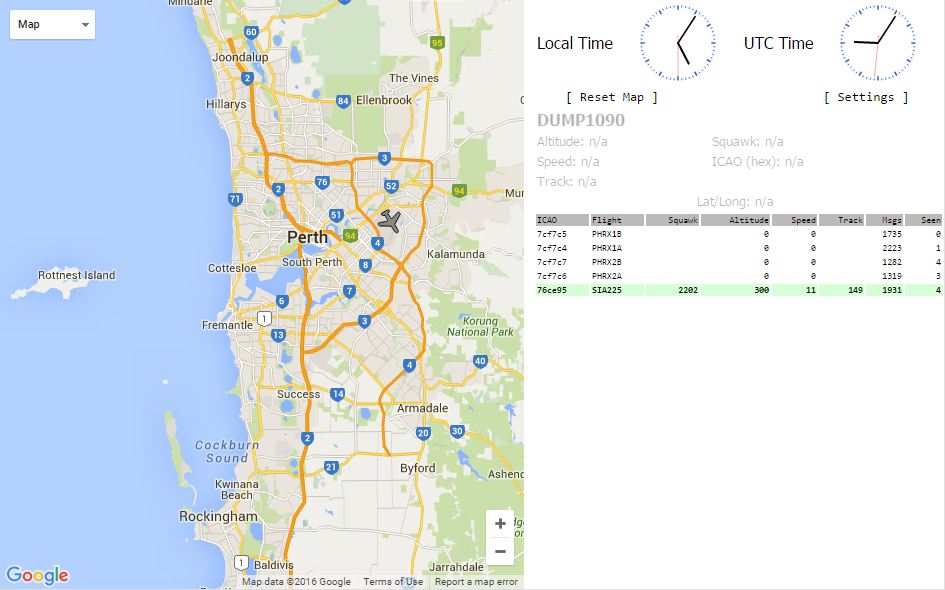
Dump1090 has a web interface that can give a live feed of data it is picking up. This can be looked at by pointing the browser at the IP of your device on port 8080
http://10.190.78.41:8080

Setup PiAware
From the official guide over at FlightAware. Download the package
cd ~
wget http://flightaware.com/adsb/piaware/files/piaware_2.1-5_armhf.deb
Install the deb file
sudo dpkg -i piaware_2.1-5_armhf.deb
Install any missing dependencies
sudo apt-get install -fy
Enable auto updates pushed from FlightAware
sudo piaware-config -autoUpdate 1 -manualUpdate 1
Setup PiAware with your account
sudo piaware-config -user USERNAME -password PASSWORD
Restart PiAware
sudo /etc/init.d/piaware restart
FlightAware
The PiAware package will call home with the provided details once it has restarted.
Collinear Antenna
Collinear Antenna - At the bottom of the post there are a few resources which are also good to watch / read to give a better idea about how to construct the collinear antenna.
